Authentication With Rails and React
Authentication is very useful because it allows us to login given sensitive information such as social security and billing statements. We would need to be able to build it in both the back and front end. Here, I will explain how to do that through Rails and React.
Let’s look at Rails first. To start, we need to handle authentication and authorization in the “application_controller.rb” file. See figure 1 on what must be done.

Note, I used student instead of user. Either way works.
Next step is to go to the student controller and authenticate there. From the controller, it will pass the data through the application controller. If it matches, the student will login. If not, then the student stays at the login page. See figure 2.

Now the authentication at the back end is complete. We can move to React now. First step is we need a state in out App.js file for our student. Next step is an authentication response. See figure 3. You can ignore everything after student.

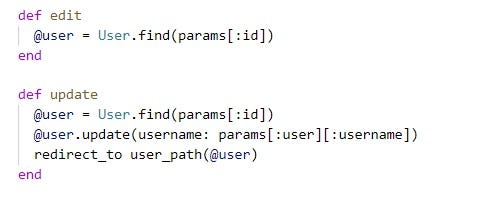
This is meant to store the data at a local storage. Now, we need a login portion for our student, as shown in figure 4.

First, we grab the information from student login. If the information matches, the student may login. If not, he cannot login.
Finally, we need one for the student to sign up. The page will ask for name, password, age, and location. Once all criteria is met, the new student will be able to sign up.

Now everything is met. This is all the parts the developer needs to build authentication using Rails and React.